Related Support Center Articles
| Mass Invoice Entry | Vendor Record |
Overview
The Mass Invoice Entry screenis designed to make manual entry of Vendor Invoices as quick as possible.
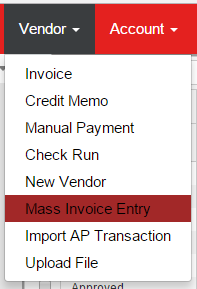
Step 1: Open theMass Invoice Entry screen
Hover over the Vendor menu in the top ribbon and select 'Mass Invoice Entry'
Step 2: Set Temporary Settings
Unlike the AP Invoice form, there are Temporary Settings that can make data entry even faster. These settings must be updated each time you use the Mass Invoice Entry Screen.

- Detail Comment: toggle to display a 'Detail Comment' field for each Detail line of the invoice. These comments will not appear in the Invoice Grid below, but will appear on the AP Invoice record
- Vendor Selection: when set to 'Blank', the Vendor field will be cleared out each time you click 'Next Invoice', allowing you to select a different Vendor. When set to 'Prior Vendor', the Vendor field will remain populated with the vendor from the last invoice entered
- Location Selection: identical to the Vendor Selection, the Location field can be cleared out, or set to the Location from the last invoice entered.
- Location Position: set where you want the Location selector to be located in the entry area. When set to 'Top', the Location selector is placed in-between Vendor and Number, with the remaining fields being shifted to the right.
Each of these temporary settings allow you to customize your entry experience, allowing for quick tabbing between fields.
Step 3: Enter Invoice Header and Details
Enter the header information starting with Vendor. Once all header values have been entered, select the Expense account and enter the Amount. Up to 20 different Expense Accounts can be used for expense allocation.

To add additional Detail rows, update the Amount value in the last row then click off or use the 'Tab' key and the form will add the next Detail row. Additional Detail rows can only be added if there is a remaining Amount that needs to be assigned.

Step 4: Click 'Next Invoice' to add Invoice to Invoice Grid and begin Next Invoice
Click any of the 'Next Invoice' buttons to add the Invoice to the Invoice Grid. The grid will immediately update, and the entry fields will be reset.
Repeats Steps 3 and 4 until all invoices have been entered.
Note: As a best practice, limit invoice batches to 25 invoices. Invoices listed in the Invoice Grid have not been created yet
Step 5: Create Invoices
Click the Create Invoice action at the top of the Mass Invoice Entry form. This action will create and save each invoice that has been entered in to the Invoice Grid.
Invoices created by Accounting Managers will automatically be Approved, while invoices created by Restaurant Managers will be Unapproved.